Monday, 4 February 2013

Date Picker in Android

In This Section we Know the how to use Date Picker Dialog in android to pick date and show in textview:

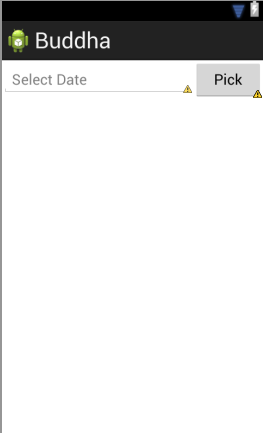
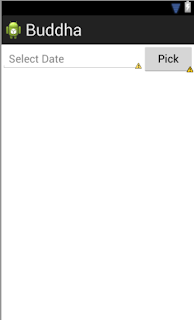
1) Layout for  Date Picker Activity

                     <LinearLayout
                            android:layout_width="match_parent"
                            android:layout_height="wrap_content" >

                            <EditText
                                android:id="@+id/editText2"
                                android:layout_width="wrap_content"
                                android:layout_height="wrap_content"
                                android:layout_weight="1"
                                android:ems="10"
                                android:hint="Select Date" />

                            <Button
                                android:id="@+id/button2"
                                android:layout_width="wrap_content"
                                android:layout_height="wrap_content"
                                android:layout_weight="1"
                                android:text="Pick" />
                        </LinearLayout>
2) Java Activity Code :
        public class Scheduler extends Activity implements OnClickListener {
private int year;
private int month;
private int day;
static final int DATE_DIALOG_ID = 123;
private Button b1;
private EditText date;
/** Called when the activity is first created. */
@Override
public void onCreate(Bundle savedInstanceState) {
super.onCreate(savedInstanceState);
setContentView(R.layout.activity_schedule);
b1=(Button)findViewById(R.id.button1);
b1.setOnClickListener(this);
date=(EditText)findViewById(R.id.editText2);
final Calendar c = Calendar.getInstance();
year = c.get(Calendar.YEAR);
month = c.get(Calendar.MONTH);
day = c.get(Calendar.DAY_OF_MONTH);
        }
@Override
public void onClick(View arg0) {
if(arg0==b1)
{
showDialog(DATE_DIALOG_ID);
}
}

@Override
protected Dialog onCreateDialog(int id) {
switch (id) {
case DATE_DIALOG_ID:
return new DatePickerDialog(this, datePickerListener,
year, month,day);
}
return null;
}

private DatePickerDialog.OnDateSetListener datePickerListener
= new DatePickerDialog.OnDateSetListener() {

public void onDateSet(DatePicker view, int selectedYear,
int selectedMonth, int selectedDay) {
year = selectedYear;
month = selectedMonth;
day = selectedDay;
date.setText(new StringBuilder().append(month + 1)
.append("/").append(day).append("/").append(year).append(" "));
                         }
};
    }


Saturday, 2 February 2013

How To use button In android

How To use Buttons Event
In this Section we see that how we use android Button widget in android application and how we hendal Button event.
Step 1: First create A new Project. Then in our activity layout Put a button  from widget controls. then our layout look like bellow code
<RelativeLayout xmlns:android="http://schemas.android.com/apk/res/android"
    xmlns:tools="http://schemas.android.com/tools"
    android:layout_width="match_parent"
    android:layout_height="match_parent"
    tools:context=".ButtonActivity" >

    <Button
        android:id="@+id/button1"
        android:layout_width="wrap_content"
        android:layout_height="wrap_content"
        android:layout_centerHorizontal="true"
        android:layout_marginTop="29dp"
        android:text="Button" />

</RelativeLayout>

Setp 2: Now in java Code

import android.os.Bundle;
import android.app.Activity;
public class ButtonActivity extends Activity {
@Override
protected void onCreate(Bundle savedInstanceState) {
super.onCreate(savedInstanceState);
setContentView(R.layout.activity_button);
}
}


Create Object of Button and assing with button which is created in layout
Button b=(Button)findViewById(R.id.button1);
Now Set Click Event on Button Object

b.setOnClickListener(new OnClickListener() {

@Override
public void onClick(View arg0) {
// TODO Auto-generated method stub
//write code which you want to do on click event
}
});

Wednesday, 10 October 2012

Read File by extension from memory in android


private static void searchFolderRecursive1(File folder) {
    if (folder != null) {
        if (folder.listFiles() != null) {
            for (File file : folder.listFiles()) {
                if (file.isFile()) {
                    if(file.getName().contains("file extension")){
                        Log.v("ooo", "path__="+file.getName());
                    }
                } else {
                    searchFolderRecursive1(file);
                }
            }
        }
    }
}

Friday, 5 October 2012

Play Audio fron url or Server in android

try {
                MediaPlayer player = new MediaPlayer();
                player.setAudioStreamType(AudioManager.STREAM_MUSIC);
                player.setDataSource("server mp3 link" );
                player.prepare();
                            player.start();

            } catch (Exception e) {
                // TODO: handle exception
            }

Thursday, 4 October 2012

What is push massage Service in Android (Cloud to device messaging )

Most mobile apps require data from the Internet. One approach for updating its data is that the apps periodically polls a server for new data (Polling). If no new data is available this approach uses unnecessary network bandwidth and consumes the battery of the mobile phone.
An alternative approach is that the server contacts the mobile app once new data is available (Push). If the data does not change constantly, Push is the preferred solution. 

As of Android 2.2 it is possible to push information to an Android app. This service is called Cloud to Device messaging or short C2DM.
In a C2DM you have three involved parties. The application server which wants to push messages to the Android device, Googles C2DM servers and the Android app. The program on the application server can be written in any programming language, e.g. Java, PHP, Python, etc.
When the application server needs to push a message to the Android application, it sends the message via an HTTP POST to Google’s C2DM servers.
The C2DM servers route the message to the device. If the device is not online, the message will be delivered once the device is available. Once the message is received, an Broadcast Intent is created. The mobile app has registered an Intent Receiver for this Broadcast. The app is started and processes the message via the defined Intent Receiver.
C2DM messages are limited in size to 1024 bytes and are intended to inform the device about new data not to transfer it. The typical workflow is that Googles C2DM servers notify the Android app that new data is available. Afterwards the Android app fetches the data from a different server.

Tuesday, 2 October 2012

Display Text on User Define Path on android canvas

Path circle = new Path();
circle.addCircle(centerX, centerY, radius, Direction.CW);
// set the color and font size
Paint paint = new Paint();
paint.setColor(Color.BLUE);
paint.setTextSize(30);
paint.setAntiAlias(true);
// draw the text along the circle
canvas.drawTextOnPath(QUOTE, circle, 0, 30, paint);

Convert milliseconds to HH:MM:SS String in java


  1. long timeMillis = ...;  
  2. long time = timeMillis / 1000;  
  3. String seconds = Integer.toString((int)(time % 60));  
  4. String minutes = Integer.toString((int)((time % 3600) / 60));  
  5. String hours = Integer.toString((int)(time / 3600));  
  6. for (int i = 0; i < 2; i++) {  
  7. if (seconds.length() < 2) {  
  8. seconds = "0" + seconds;  
  9. }  
  10. if (minutes.length() < 2) {  
  11. minutes = "0" + minutes;  
  12. }  
  13. if (hours.length() < 2) {  
  14. hours = "0" + hours;  
  15. }  
  16. }